

The unique BetaFPV Pavo Pico was one of many smallest FPV drones able to carrying the DJI O3 Air Unit. BetaFPV has now upgraded it with assist for each the DJI O4 Lite and DJI O4 Professional — meet the brand new Pavo Pico II! On this overview, I’ll stroll you thru the design, methods to set up the O4 and O4 Professional, the way it flies, and make it easier to determine whether or not that is the correct drone for you.


Be taught extra about cinewhoops on this purchaser’s information: https://oscarliang.com/cinewhoop/
The place to Purchase
You may get the BetaFPV Pavo Pico II from:
It’s obtainable in two variations:
- With DJI O4 Air Unit (Lite) pre-installed
- PNP model (no Air Unit included)
I’m reviewing the PNP model right here. It comes with two canopies — one for the DJI O4 Lite and one for the DJI O4 Professional, so whichever Air Unit you select, you’re coated.
Oh! And don’t overlook to seize some spare props and batteries.
Spare Propellers (Gemfan 45mm 3-Blade):
Batteries (LAVA 2S 550mAh):

Equipment within the field:
- 4 × Gemfan 45mm 3-Blade Propellers
- 1 × USB Adapter (Sort-C to 4-pin SH1.0 Connector)
- 1 × Phillips Screwdriver
- 1 × H1.5 Hex Screwdriver
- 1 × Cover for DJI O4 Air Unit
- 1 × Cover for DJI O4 Professional Air Unit
- Mounting {hardware} for the DJI O4 Professional and O4
Specs
- Wheelbase: 80 mm
- Body: Pavo Pico II Brushless Whoop Body
- Flight Controller: F4 20A AIO FC
- Propellers: Gemfan 45mm 3-Blade
- Motors: LAVA 1102 14,000 KV
- Battery Connector: XT30
- Enter Voltage: 2S
- Receiver Choices: 2.4GHz ExpressLRS or DJI SBUS
- Weight:
- With out FPV Setup: 41g
- With DJI O4: 54g (84g with 2S 550mAh)
- With DJI O4 Professional: 78g (108g with 2S 550mAh)

Design & Construct
I actually preferred the unique Pavo Pico — paired with the DJI O3, it was able to capturing surprisingly stunning footage for its dimension. So I used to be genuinely excited to see BetaFPV improve it to assist not solely the DJI O4 Lite, but additionally the O4 Professional Air Unit.
The Pavo Pico II ships with two cover choices, letting you select primarily based on which DJI Air Unit you propose to make use of. Apparently, the cover for the O4 Professional is the very same one used on the Pavo20 Professional, whereas the O4 Lite cover is a brand new design.

At first look, the Pavo Pico II appears to be like fairly just like the Pavo Femto, however there are a couple of key variations. The Pico II makes use of bigger 45mm propellers in comparison with the Femto’s 40mm props. Regardless of the dimensions improve, the Pico II stays extraordinarily compact — nonetheless a lot smaller than the Pavo20.

Left: Pavo Pico II; Proper: Pavo20
One of many largest enhancements on the Pavo Pico II is the redesigned digital camera mounting system for the DJI O4 Lite, aimed particularly at eliminating jello in footage. On the Pavo Femto, the O4 Lite digital camera was held by small rubber strips, which regularly led to undesirable vibration. On the brand new Pico II, BetaFPV fully reworked the design — now all the digital camera cage, together with the Air Unit, is soft-mounted on 4 giant rubber grommets.

Set up the DJI O4 Lite
Mounting the DJI O4 Lite on the Pavo Pico II isn’t essentially the most simple course of, particularly since BetaFPV doesn’t present any directions. It took me a little bit of trial and error, however right here’s how I managed to put in it efficiently.
Set up the 4 o-rings on the pillars beneath the cover. These assist cushion the Air Unit’s essential board.

Place the O4 essential board into the cover, resting it on the o-rings.

Exchange the inventory antenna with the shorter antenna included with the Pavo Pico II. The shorter one suits higher and retains the construct compact.

Connect the plastic case to the digital camera (this piece comes with the DJI O4 Air Unit however isn’t pre-installed). Make sure that it clicks securely in place.

Mount the digital camera into the cover utilizing the self-tapping screws supplied.

Set up the 4 rubber grommets onto the plastic backside plate of the digital camera cage. Word that the grommet ends are totally different sizes — a smaller aspect and a much bigger aspect. The smaller finish ought to face the digital camera cage, whereas the larger finish faces the drone body.

Safe the underside plate to the digital camera cage with the 6 tiny screws supplied. Tighten them evenly however don’t over-torque them — they’re very small.


Lastly, mount the digital camera cage to the drone. There are not any screws wanted right here — merely slot the grommets into the carbon fibre body’s cutouts. As soon as in place, the rubber holds the cage securely.


Set up the DJI O4 Professional
Putting in the DJI O4 Professional is far easier — it follows the identical course of because the Pavo20.
Exchange the inventory antennas with the shorter variations included within the equipment.
- This step is non-compulsory, however I extremely advocate it. You’ll save nearly 3 grams, which is substantial on such a light-weight drone.
- The smaller antennas are additionally extra compact, much less more likely to snag on branches, and higher suited to tight areas.
- Until you’re flying lengthy vary, these shorter antennas nonetheless present loads of sign vary — simply a few kilometres outside and greater than sufficient for indoor flying.

Set up the Air Unit inside the cover. It merely clips into place — no screws required.

Safe the digital camera into the cover utilizing the screws supplied.

Insert the 4 rubber grommets, adopted by the bolts that undergo them.


Join the Air Unit to the flight controller utilizing the prevailing 4-pin cable.
Lastly, mount the digital camera cage on high of the drone. Don’t fear about overtightening the bolts — they’re solely threaded midway. Simply preserve turning till they cease naturally.


Battery and Charging
Due to the inflexible battery mount design — created from non-flexible, injection-molded plastic — the Pavo Pico II solely helps batteries of a particular dimension. The slot comfortably suits packs with a width and peak of roughly 25.5 × 24 mm, which limits compatibility considerably.
BetaFPV recommends their LAVA 2S 550 mAh packs, and so they match completely. Different batteries of comparable dimensions may work, however something bigger gained’t slide into the mount simply with out modification.
Get the LAVA 2S 550mAh right here:


You possibly can clip off the battery holder, and loop a strap by way of, so you should utilize batteries of different sizes. However you should get your individual battery strap because it’s not included.
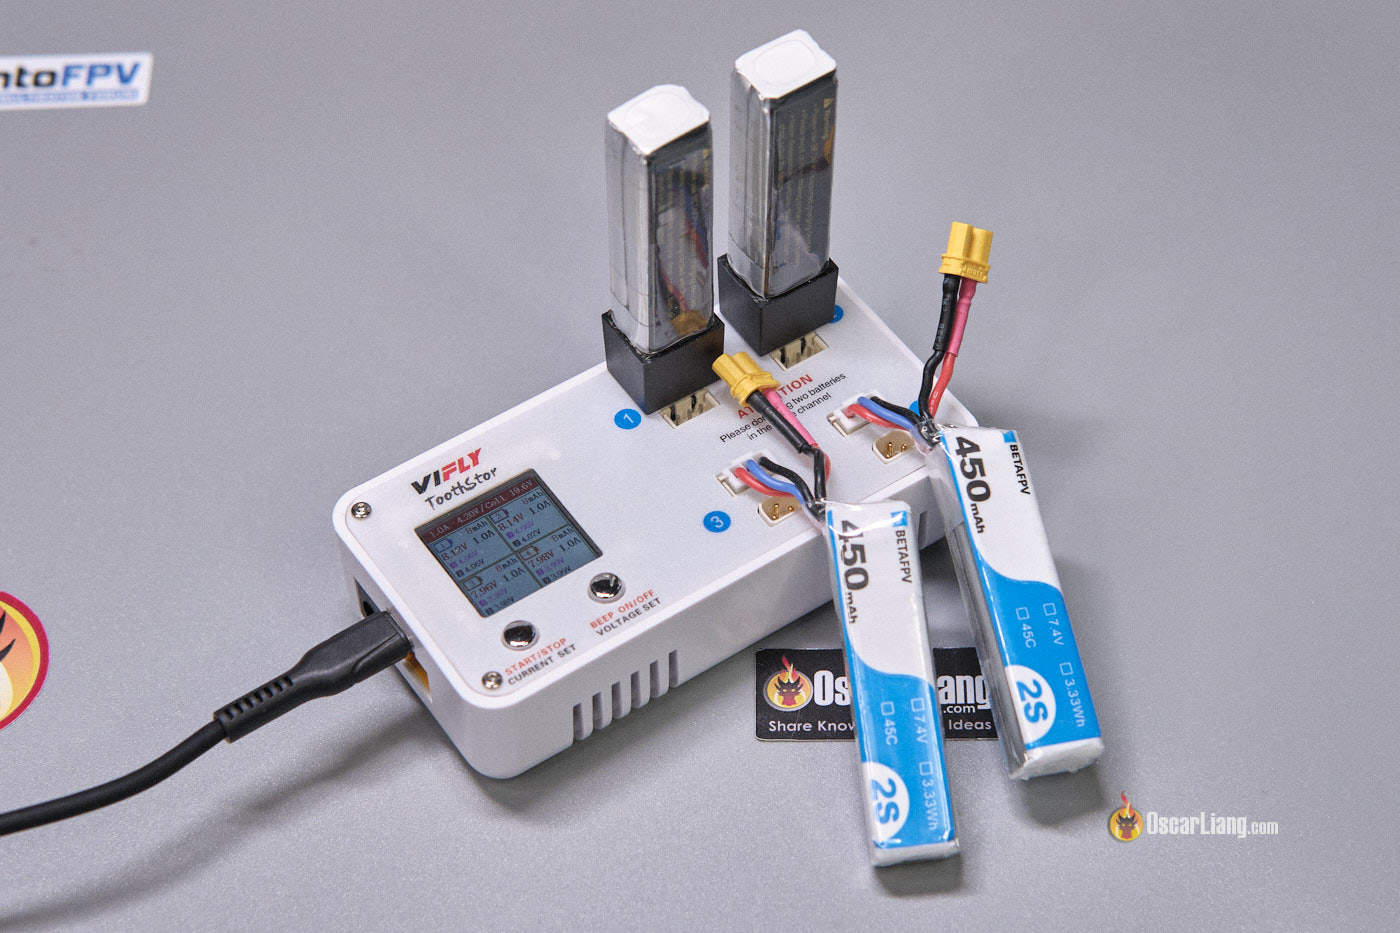
For charging, I’ve been utilizing the Vifly ToothStor, a easy LiPo charger designed for 2S packs. It actually simplifies charging small batteries within the discipline.
Flight Efficiency & Video High quality
I examined the Pavo Pico II utilizing BetaFPV’s LAVA 2S 550 mAh LiPo packs, flying with each the DJI O4 Lite and DJI O4 Professional Air Items.
PID & Filter Tune
The Pico 2 seems to have a customized PID tune, however the filters are left at default values which I believe could be optimized additional (so can the PID tune). Regardless of the conservative tune, it nonetheless flew fairly effectively in my testing, I believe most individuals could be proud of the way it performs. Anyway I’ll attempt to create my very own filter and PID tune for this quad and publish it on my patreon perhaps in per week or two. Let me know within the remark if you wish to see the tune for the O4 Lite or the O4 Professional.
With DJI O4 Lite
Flight time: round 6 minutes
Video high quality: The redesigned soft-mount system fully eliminates jello in my testing. Additionally each DJI Rocksteady and Gyroflow stabilization labored superbly, delivering clean, cinematic footage. Even with none stabilization utilized, the uncooked footage appeared surprisingly clear and vibration-free — completely usable for informal flying.
Dealing with: With the lighter O4 Lite put in, the Pavo Pico II feels extraordinarily nimble and agile, perfect for tight areas or fast-moving photographs. It’s fast, responsive, and playful — excellent for park flying, indoor flights, or mild freestyle.


With DJI O4 Professional
Flight time: round 4.5 minutes
Video high quality: As anticipated from the DJI O4 Professional, picture high quality is excellent. You get crisp 4K footage with wealthy element and wonderful shade depth, even in breezy circumstances. I strongly advocate including an ND filter, each to enhance picture high quality and defend the lens. The O4 Professional digital camera sits barely ahead of the prop guards, making it weak in crashes. BetaFPV sells a devoted ND filter set for the O4 Professional: https://oscarliang.com/betafpv-nd-filters-dji-o4-pro/.
Dealing with: Regardless of the added weight, the Pico II nonetheless performs fairly effectively. The LAVA 1102 motors deal with the load with ease, giving the drone sufficient thrust for clean cinematic cruising. It’s noticeably slower and “tankier” than with the O4 Lite, and barely much less responsive. I believe it’s perfect for sluggish, flowing, cinematic photographs slightly than quick, acrobatic maneuvers.


Setup for the First Flight
Connecting the Pavo Pico 2 to Betaflight Configurator utilizing the supplied USB-C adapter (the port is positioned on the rear of the drone).
FC / ESC / RX Firmware:
- Flight Controller Board Goal: BETAFPVF405 (preloaded with Betaflight 4.5.0). Authentic CLI Diff obtainable right here.
- ESC Firmware: Pre-flashed with Bluejay (C-X-70, v0.19)
- Onboard Receiver: BETAFPV 2.4GHz AIO RX operating ExpressLRS v3.5.6
Setup Directions:
- Bind the ELRS Receiver: Plug within the USB cable, wait about 60 seconds till the receiver enters WiFi mode (inexperienced LED flashing quickly). In your cellphone, be a part of the ExpressLRS RX WiFi community (ensure that to position your cellphone near the drone, because the WiFi sign from the FC is extraordinarily weak). Open browser and go to 10.0.0.1, then enter your bind phrase on the webpage. Detailed directions could be discovered right here: https://oscarliang.com/bind-expresslrs-receivers/#Methodology-3-Getting into-Bind-Phrase-in-Internet-UI
- Pair the DJI O4 Air Unit together with your Goggles: Comply with the directions right here: https://oscarliang.com/how-to-setup-dji-o4-lite/#Pairing-DJI-Goggles-3-with-O4-Lite. The O4 doesn’t require activation, so you may fly as quickly because it’s paired.
- Setup the Modes Tab: Configure your arm swap, angle mode, and turtle mode. For steering, see this tutorial: https://oscarliang.com/betaflight-modes/#How-to-Setup-Arm-Swap
- In Energy tab, set warning voltage to three.4V, and min voltage to three.2V – I are likely to land when voltage drops to three.3V attributable to voltage sag, and while you land the voltage would usually rise to three.5-3.6V.
That’s it—your Pavo Pico 2 ought to now be prepared for its maiden flight!
Remaining Ideas – Who Is the Pavo Pico II For?
The BetaFPV Pavo Pico II fills a novel spot within the Pavo lineup. Whereas the Pavo Femto solely helps the DJI O4 Lite, and the Pavo20 solely helps the DJI O4 Professional, the Pico II is essentially the most versatile of the three — it helps each air items proper out of the field!
Get the Pavo Pico II right here:
Dimension-wise, it sits between the Femto and the Pavo20. It’s simply highly effective sufficient to deal with the DJI O4 Professional Air Unit, and realistically, you may’t get any smaller than this whereas conserving the drone flyable and well-balanced.
For out of doors flying, the Pavo20 is undoubtedly the extra succesful platform for carrying the heavier O4 Professional. It’s extra agile, highly effective, and higher suited to quicker freestyle flying. It additionally handles the wind higher. Nonetheless, in case your objective is slower, secure cinematic footage within the smallest attainable kind issue, the Pavo Pico 2 completely delivers. At simply 108g AUW (together with battery and O4 Professional), it’s astonishing how a lot efficiency BetaFPV has managed to pack into such a tiny drone.
With the lighter DJI O4 Lite, the Pico 2 really shines. It transforms right into a nimble micro ripper — quick, enjoyable, and able to weaving by way of tight areas with ease. The bigger 45mm props give it noticeably extra thrust and effectivity than the Femto, whereas the improved digital camera mount largely eliminates jello. Regardless of being nearly the identical weight, it performs much better outside, making it my most well-liked alternative between the 2.
Should you’ve been on the lookout for a tiny DJI FPV cinewhoop that balances enjoyable and performance, the Pavo Pico II would possibly simply be the proper match.
Don’t overlook to get some spare propellers: