

Unlock the potential of ASA filament for sturdy, out of doors 3D prints! Dive into our complete information and elevate your 3D printing abilities.
Up to date on September 6, 2023
by
MatterHackers
Welcome to the thrilling realm of 3D printing with ASA filament! ASA, or Acrylonitrile Styrene Acrylate, is a strong and weather-resistant materials that is gaining reputation amongst 3D printing lovers. The explanation? Its distinctive capability to resist exterior parts makes it preferrred for out of doors purposes.
Whether or not you are planning to design a captivating backyard gnome, a sturdy out of doors planter, or some other out of doors fixture, ASA filament is a wonderful selection. Its properties are akin to ABS filament, but it surpasses ABS when it comes to resistance to UV mild and weathering. This implies ASA will not yellow within the solar or lose its power over time, making it a superior selection for out of doors and long-lasting tasks.
Should you’re new to printing with ASA, otherwise you’re seeking to refine your abilities, you are in the correct place. This information will give you the important ideas and methods to make sure your success in 3D printing with ASA filament. Let’s dive in!
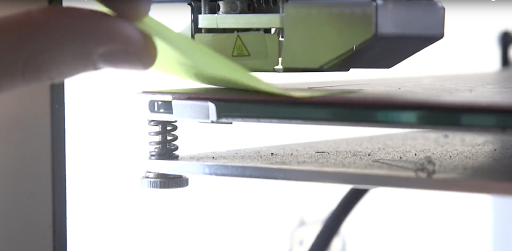
Step 1: Nailing the First Layer
The primary layer of your print is essential. It is a two-pronged course of: making certain your mattress is stage and setting the right distance between the nozzle and the mattress.
Leveling the Mattress
Mattress leveling varies from printer to printer. Some printers present guided wizards or auto mattress leveling, whereas others go away you to determine it out. Usually, 3D printer mattress surfaces are leveled utilizing three or 4 screws that connect the mattress to a carriage. Adjusting these screws modifications the airplane the mattress is on. Here is a simplified process:
- Transfer your print head out of the mattress’s solution to keep away from any crashes.
- House the Z axis to carry the nozzle as near the mattress as doable.
- Transfer the print head above one of many screws and insert a bit of paper between the mattress and the nozzle.
- Loosen the screw till there’s a slight resistance between the mattress and the nozzle.
- Repeat this course of with the remainder of the screws. The purpose is to realize the identical resistance in any respect factors.
Adjusting Nozzle Distance
As soon as the mattress is stage, you have to make sure the nozzle is on the proper distance from the mattress. Begin a print with a skirt that covers the whole mattress space and observe how the filament is laid down. Modify the nozzle’s distance accordingly till the skirt comes out okay.
Be taught extra about getting the most effective first layer for each print right here.
Step 2: Print Mattress and Adhesion
ASA filament, just like its ABS counterpart, is temperature-sensitive and requires a heated mattress for optimum efficiency. In case your 3D printer comes outfitted with a heated mattress, here is methods to put together it for ASA printing:
-
Use a Brim: Begin your print with a brim – a flat space across the base of your mannequin to stop warping. A brim of about 15 loops often suffices for many prints.
-
Apply a Mattress Adhesive: Trendy 3D printing has moved past the usage of hairsprays and selfmade options. At present, a number of firms manufacture adhesives particularly designed for 3D printing. These merchandise, similar to Magigoo or Stick Stick, present glorious adhesion in your prints and are straightforward to use. Merely unfold a skinny layer in your print mattress earlier than beginning your print.
-
Set the Proper Mattress Temperature: The optimum mattress temperature for ASA is round 110C. Nonetheless, in case your printer cannot attain this temperature, purpose for the utmost it will possibly obtain.
-
Contemplate a Construct Floor: Think about using a devoted construct floor on prime of your heated mattress. Construct surfaces, similar to LayerLock, PEI sheets, or BuildTak, can improve adhesion and guarantee a extra uniform warmth unfold throughout the mattress, lowering the probabilities of warping.
Keep in mind, every 3D printer and filament can have distinctive traits, so you might have to experiment with these settings to realize the most effective outcomes.

Utilizing a mattress adhesive may help your first layer go down easily and scale back warping.
Step 3: Calibrating Your Print Temperature
Usually, ASA prints at 250 levels Celsius with a mattress temperature of 110 levels Celsius. Nonetheless, you might want to regulate these temperatures in your particular printer. Keep in mind, it is higher to print ASA barely scorching than too chilly to keep away from warping or splitting.
Extruder Temperature: ~ 250°C
Mattress Temperature: ~ 110°C
In case your temperature is just too low, you’ll expertise warping, splitting, and horrible layer adhesion. In case your temperature is just too scorching, you may expertise stringing and a few rougher overhangs.

Step 4: Fixing Warping and Splitting
Regardless of good settings, ASA prints can nonetheless warp or break up attributable to temperature inconsistencies. To mitigate this, think about using ASA on a fully-enclosed 3D printer, buying an enclosure, or constructing an enclosure in your printer to maintain the warmth in and funky air out.
Moreover, flip off layer cooling followers as they will cool your prints too rapidly, inflicting splits and points in your print.
There you might have it – a complete information to mastering 3D printing with ASA filament. With its sturdiness and resistance to weathering, ASA presents distinctive prospects for out of doors and long-lasting tasks, making it a useful addition to your 3D printing repertoire.
Keep in mind, like all 3D printing endeavor, it could take some trial and error to search out the proper settings in your printer and challenge. Do not be discouraged in case your first few makes an attempt aren’t flawless. Preserve refining your course of, and shortly, you will be creating gorgeous and sturdy 3D prints with ASA filament.
So, are you able to embark in your ASA printing journey? With the information you have gained from this information, you are well-equipped to discover the potential of ASA filament. We won’t wait to see what you create.
Joyful printing!